Let's make RGB Triangle
Let's see what are we going to make today:
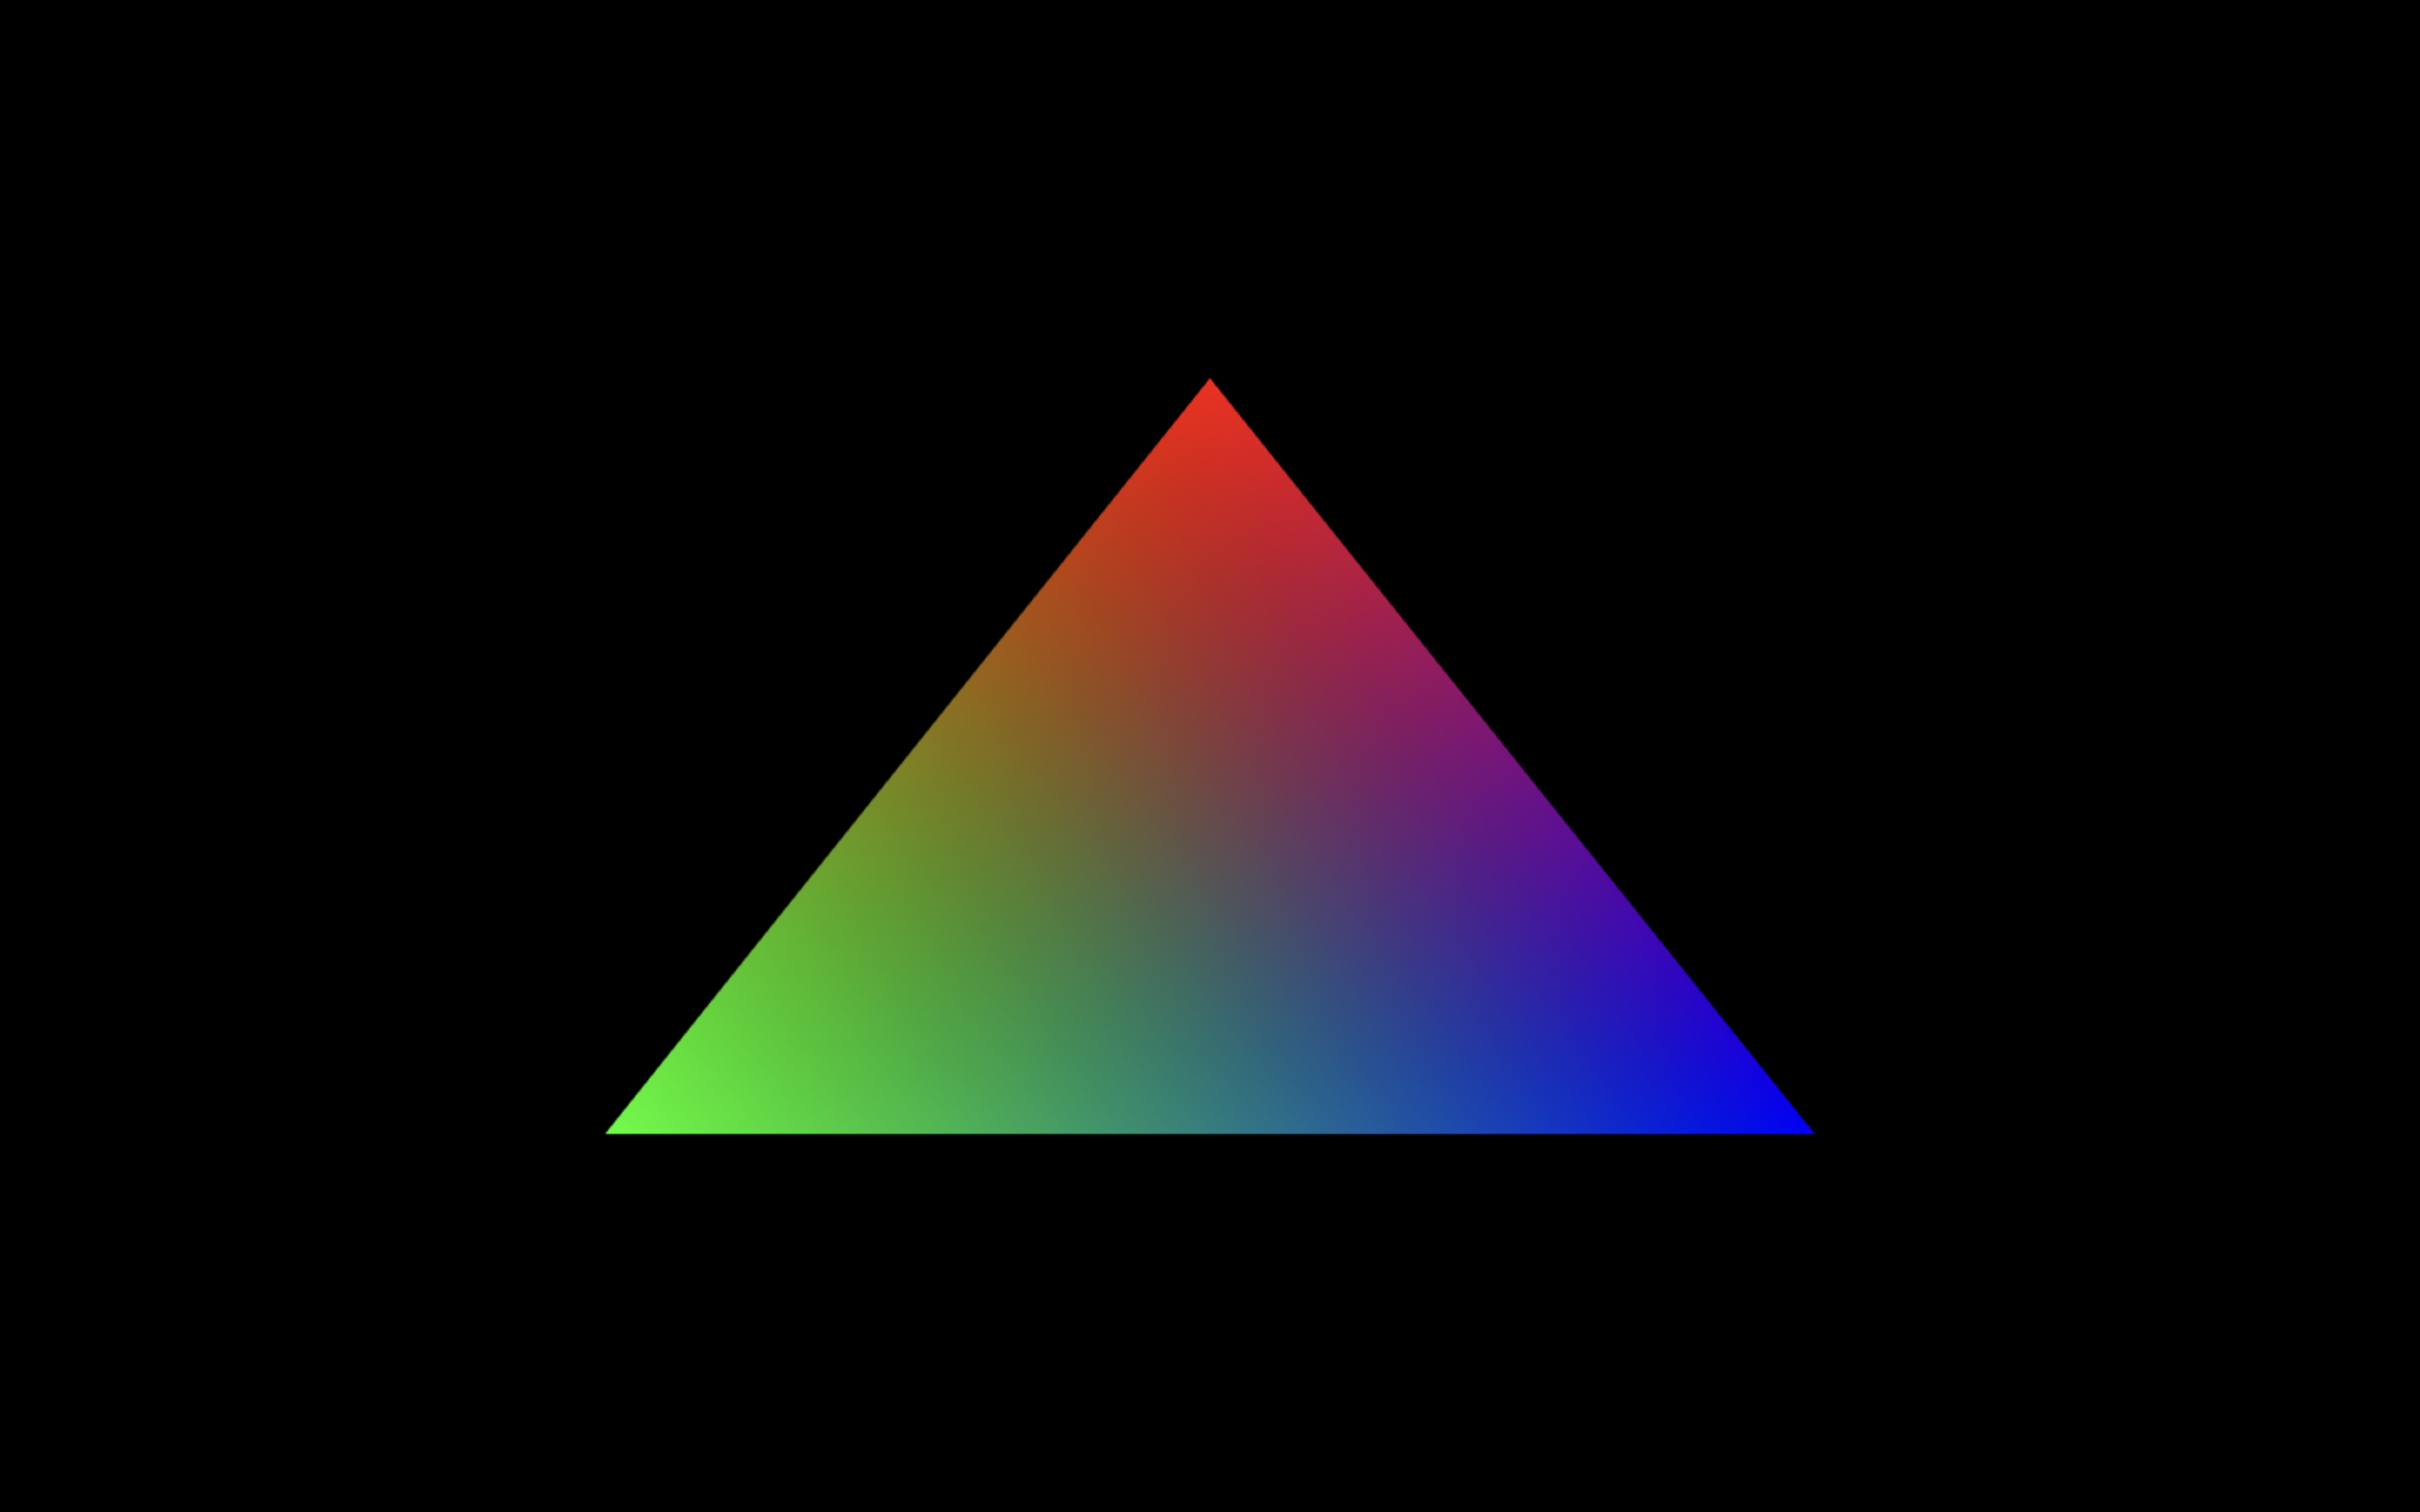
- The top vertex is colored red
- The left vertex is green
- The right vertex is blue
- Every other point inside the triangle is just a blend all three colors
So, how do we make this happen?
One thing is clear: we need to tell the GPU that the top vertex is red, the left one is green, and the right one is blue.
And what do we use when we want to pass something per vertex?
Yeah! You got it right — attributes
So, we’ll create a new attribute in the vertex shader that takes in the color for each vertex.
For now, ignore how the blended colors inside the triangle are handled — the GPU takes care of that automatically. We will discuss this part towards in the end of this chapter in the Bonus Section.
But there’s still a small problem.
The actual coloring is done in the fragment shader, while the color information currently exists only in the vertex shader.
So now the question is:
how do we pass these vertex colors from the vertex shader to the fragment shader?
That’s exactly what we’re going to figure out next, by looking at the code for the vertex and fragment shader.
Vertex Shader:
// vertex shader
const vertexShaderSource = `#version 300 es
in vec2 a_position;
in vec3 a_color;
out vec3 frag_color;
void main(){
  gl_Position = vec4(a_position,0,1);
  gl_PointSize = 30.0;
  frag_color = a_color;
}`;
Notice that we have added two new lines at the top:
in vec3 a_color;out vec3 frag_color;
You are already familiar with the first one, it's there for taking vertex color inputs.
The next line is outputting a vec3 frag_color, but for whom it's outputting?
It's for the fragment shader. The vertex shader's outputs are grabbed by the fragment shader.
Note that the frag_color is being initialized in the function with the a_color, that is the color that is passed as the attribute.
Let's see fragment shader:
Fragment Shader
// fragment shader
const fragmentShaderSource = `# version 300 es
precision mediump float;
in vec3 frag_color;
out vec4 color;
void main(){
  color = vec4(frag_color,1);
}`;
In the fragment shader, we add the line in vec3 frag_color.
Did you notice something important here? The output variable from the vertex shader is also named frag_color. This is not a coincidence.
This variable must have the exact same name and type in both the vertex shader (as an output) and the fragment shader (as an input). Because of this exact matching, the GPU knows that the frag_color value produced by the vertex shader should be passed to frag_color in the fragment shader.
Now you can follow the same eight steps explained earlier in the chapter Draw Multiple Points to pass color and coordinate data to the GPU.
This time, instead of only passing position data, you will also pass color data to the a_color attribute in the vertex shader. You can either follow those steps manually or use the utility function we defined to create the buffer and set the data for the a_color attribute.
The process is exactly the same — only the attribute and the data change.
Lets see the code to send color data to the vertex shader (rest of the code is same as for the Draw a Triangle):
const vertexColor = [
  1, 0, 0, // first vertex color
  0, 1, 0, // second vertex color
  0, 0, 1 // third vertex color
];

const a_color_location = gl.getAttribLocation(program, "a_color");

const colorBuffer = gl.createBuffer();
gl.bindBuffer(gl.ARRAY_BUFFER, colorBuffer);
gl.bufferData(
  gl.ARRAY_BUFFER,
  new Float32Array(vertexColor),
  gl.STATIC_DRAW
);
gl.vertexAttribPointer(a_color_location, 3, gl.FLOAT, false, 0, 0);

gl.enableVertexAttribArray(a_color_location);
Oh! I forgot about the black background, but I am sure you know how to achieve it.
Still to make these docs complete, include the lines below before issuing the draw call:
Now once you save the script.js file and open the browser you will see the RGB Triangle:
gl.clearColor(0,0,0,1);
gl.clear(gl.COLOR_BUFFER_BIT)
Final Code
script.js
//Step 1: Set the viewport
const canvas = document.querySelector("canvas");
const gl = canvas.getContext("webgl2");
canvas.height = window.innerHeight; // For making the canvas full screen
canvas.width = window.innerWidth; // For making the canvas full screen
gl.viewport(0, 0, canvas.width, canvas.height);
gl.clearColor(0, 0, 0, 1);
gl.clear(gl.COLOR_BUFFER_BIT);
//Step 2: Write the shaders
// vertex shader
const vertexShaderSource = `#version 300 es
in vec2 a_position;
in vec3 a_color;
out vec3 frag_color;
void main(){
  gl_Position = vec4(a_position,0,1);
  gl_PointSize = 30.0;
  frag_color = a_color;
}`;

// fragment shader
const fragmentShaderSource = `# version 300 es
precision mediump float;
in vec3 frag_color;
out vec4 color;
void main(){
  color = vec4(frag_color,1);
}`;

// Step 3: Compile the shaders
const vertexShader = utilCreateShader(gl, gl.VERTEX_SHADER, vertexShaderSource);

const fragmentShader = utilCreateShader(
  gl,
  gl.FRAGMENT_SHADER,
  fragmentShaderSource
);

// Step 4: Create a WebGL program
const program = utilCreateProgram(gl, vertexShader, fragmentShader);

const vertexCoordinatesAndColors = [
  0.0,  0.5,  1.0, 0.0, 0.0,  // Vertex 1 → (x, y) + (r, g, b)
 -0.5, -0.5,  0.0, 1.0, 0.0,  // Vertex 2 → (x, y) + (r, g, b)
  0.5, -0.5,  0.0, 0.0, 1.0,  // Vertex 3 → (x, y) + (r, g, b)
];

const a_position_location = gl.getAttribLocation(program, "a_position");
const a_color_location = gl.getAttribLocation(program, "a_color");

// Step 7: Use the WebGL program
gl.useProgram(program);
const pointsBuffer = utilCreateBuffer(gl, vertexCoordinatesAndColors);
gl.vertexAttribPointer(a_position_location, 2, gl.FLOAT, false, 5*4 , 0);
gl.enableVertexAttribArray(a_position_location);
gl.vertexAttribPointer(a_color_location, 3, gl.FLOAT, false, 5 * 4, 2 * 4);
gl.enableVertexAttribArray(a_color_location);

// Step 8: Issue the draw call
gl.drawArrays(gl.TRIANGLES, 0, 3);
Note: In the code above I have used the utility functions made in the last chapter
Bonus Section: How is the blending of colors happening?
Do you remember this line from the chapter Graphics Pipeline in the Rasterization Stage:
"This stage also performs interpolation of the outputs produced by the vertex shader across the primitive. We will explore this in detail later while building the RGB Triangle." ?
Now that we have actually built the RGB triangle, we can finally see what that line really meant in practice.
After the vertex shader finishes executing, all the gl_Position values along with their corresponding outputs (in our case, frag_color) move into the primitive assembly stage. Here, the GPU forms the primitive (a triangle) and forwards both the primitive and the vertex shader outputs to the rasterization stage.
Now consider this: suppose the triangle covers 1000 pixels on the screen. During rasterization, the GPU will generate 1000 fragments. But we have only provided three colors — one for each vertex. So how does the GPU decide the color of every fragment using just these three colors?
There are a few theoretical possibilities:
The GPU could assign each fragment the color of the nearest vertex, based on distance.
In that case, fragments near the red vertex would be red, those near the green vertex would be green, and those near the blue vertex would be blue — producing sharp color boundaries.Alternatively, the GPU could smoothly blend the colors of all three vertices, generating new colors for each fragment and creating a gradual transition across the triangle.
The GPU follows the second approach.
It uses interpolation to compute a weighted blend of the vertex colors for every fragment, which is why we see smooth color gradients instead of abrupt color changes.
For now, you can think of interpolation as smoothly calculating intermediate values between known values. We will use interpolation extensively in the Mapping Domains chapter, where we will also discuss its mathematical formulation.
For your information, for three point interpolation, as in case of triangles GPU uses Barycentric coordinates, you can explore it yourself on scratchapixel docs.